We all like shortcuts, but there are some shortcuts that you should avoid. Do you ever skip adding the Vendor when you are categorizing your bank feeds or entering expenses in your accounting software (ie. Quickbooks, Netsuite)? Skipping the step of adding the Vendor when you initially enter the transaction may save you a few minutes right then, but it can cost you significantly more time later. There are a number of benefits to including the Vendor field on all your transactions.
Some of the benefits to completing the Vendor/Payee field on every transaction include:
- Research - want to know who you purchased those supplies from last year? Select the expense on your P&L and you can quickly see who you paid.
- Accurate Accounts Payable - You just received an invoice from a vendor, but you think you already paid it. If you have entered the Vendor/Payee field on every expense, you can quickly locate all transactions related to that vendor.
- Consistency on your Financials - Easily check to see how you categorized those expenses in the past, by looking at past transactions for a Vendor.
- End of Year 1099s - How do you determine which vendors you need to send a 1099 to at the end of the year? You must be able to identify which vendors you paid over $600, and you can only do that if you complete the vendor field on every transaction.
- Sales Tax Audit - During a Sales Tax Audit, it should be expected that you will need to provide vendor invoices for some expenses. Save yourself some time by quickly locating the vendor of the transaction in question.
- Liability Insurance Reporting - Some liability insurance audits require knowing how much you paid different vendors last year. You can only determine that if you fill in the vendor field.
A couple of examples of where the Vendor field is located in Quickbooks are located below. Notice in the first example, which is Quickbooks Desktop, the Vendor is “ABC Supplier”. This is an auto-draft expense from a bank account. You would be able to locate all payments made to this Vendor in the Vendor Center in Quickbooks and would avoid paying the Vendor twice for this purchase. You could also quickly see what price you paid for Widgets the next time they need to be ordered.

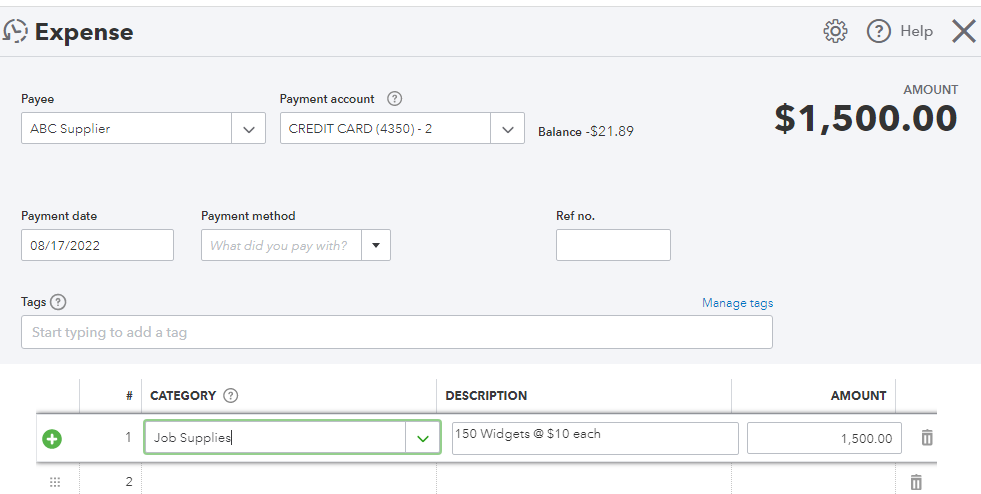
This next example is a credit card purchase in Quickbooks Online. The Vendor field is identified as “Payee”.

If you use bank feeds to populate your financials, do not just depend on the Description field. Take the time to complete the Vendor/Payee field because the research capabilities on the Description field are very limited. For example, if the bank feeds description for the above examples was, “ABC SUPLR 500 PARK AVE 877-123-4567 NY U”, locating the transaction with a simple search of “ABC Supplier” would not locate the transaction due to the spelling difference.
Most accounting software will allow you to set-up rules so that the software will fill in the Payee field once you tell it how to understand the description. It does not matter if it is a checking account expense or a credit card expense, take the time when you enter/accept the transaction. It is also the best time to include details related to the expense. Include any invoice numbers, quantities, cost per item, and SKU numbers. Anything you would like to locate easily without having to hunt for filed paper.
It will save you time later and will provide a more robust accounting tool for your business. If you have any questions about how to best set-up your accounting software, handle your Accounts Payable, process your end-of-year 1099s, or even manage a Sales Tax Audit; ADKF is here to help.

